
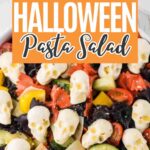
Spooky Halloween Pasta Salad
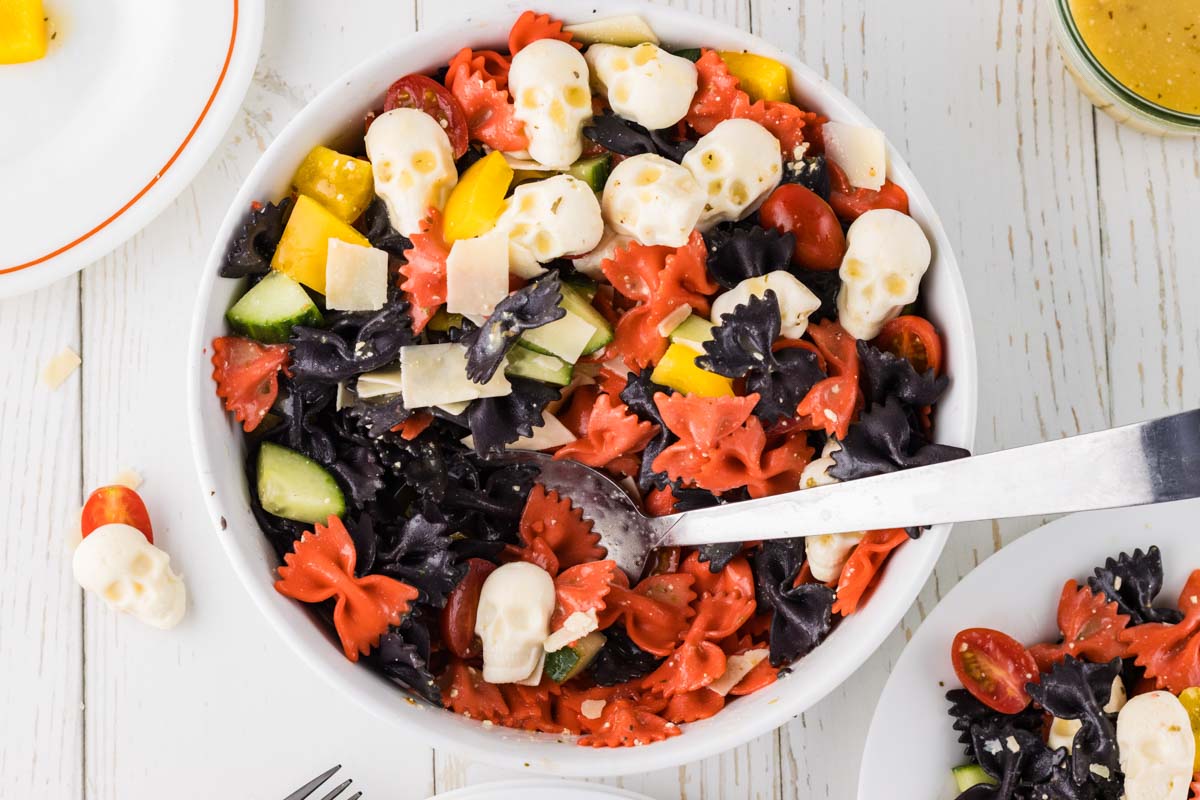
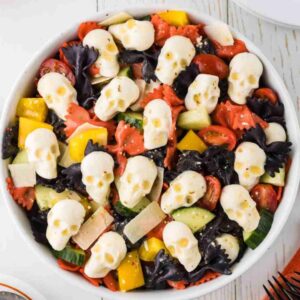
Make your Halloween spread unforgettable with this spooky Halloween pasta salad! This cold pasta salad is dyed in creepy colors and sprinkled with fun mozzarella skulls! The best part is, it’s a lot easier than you think. You’re friends and family will be completely amazed at this addition to your Halloween spread!

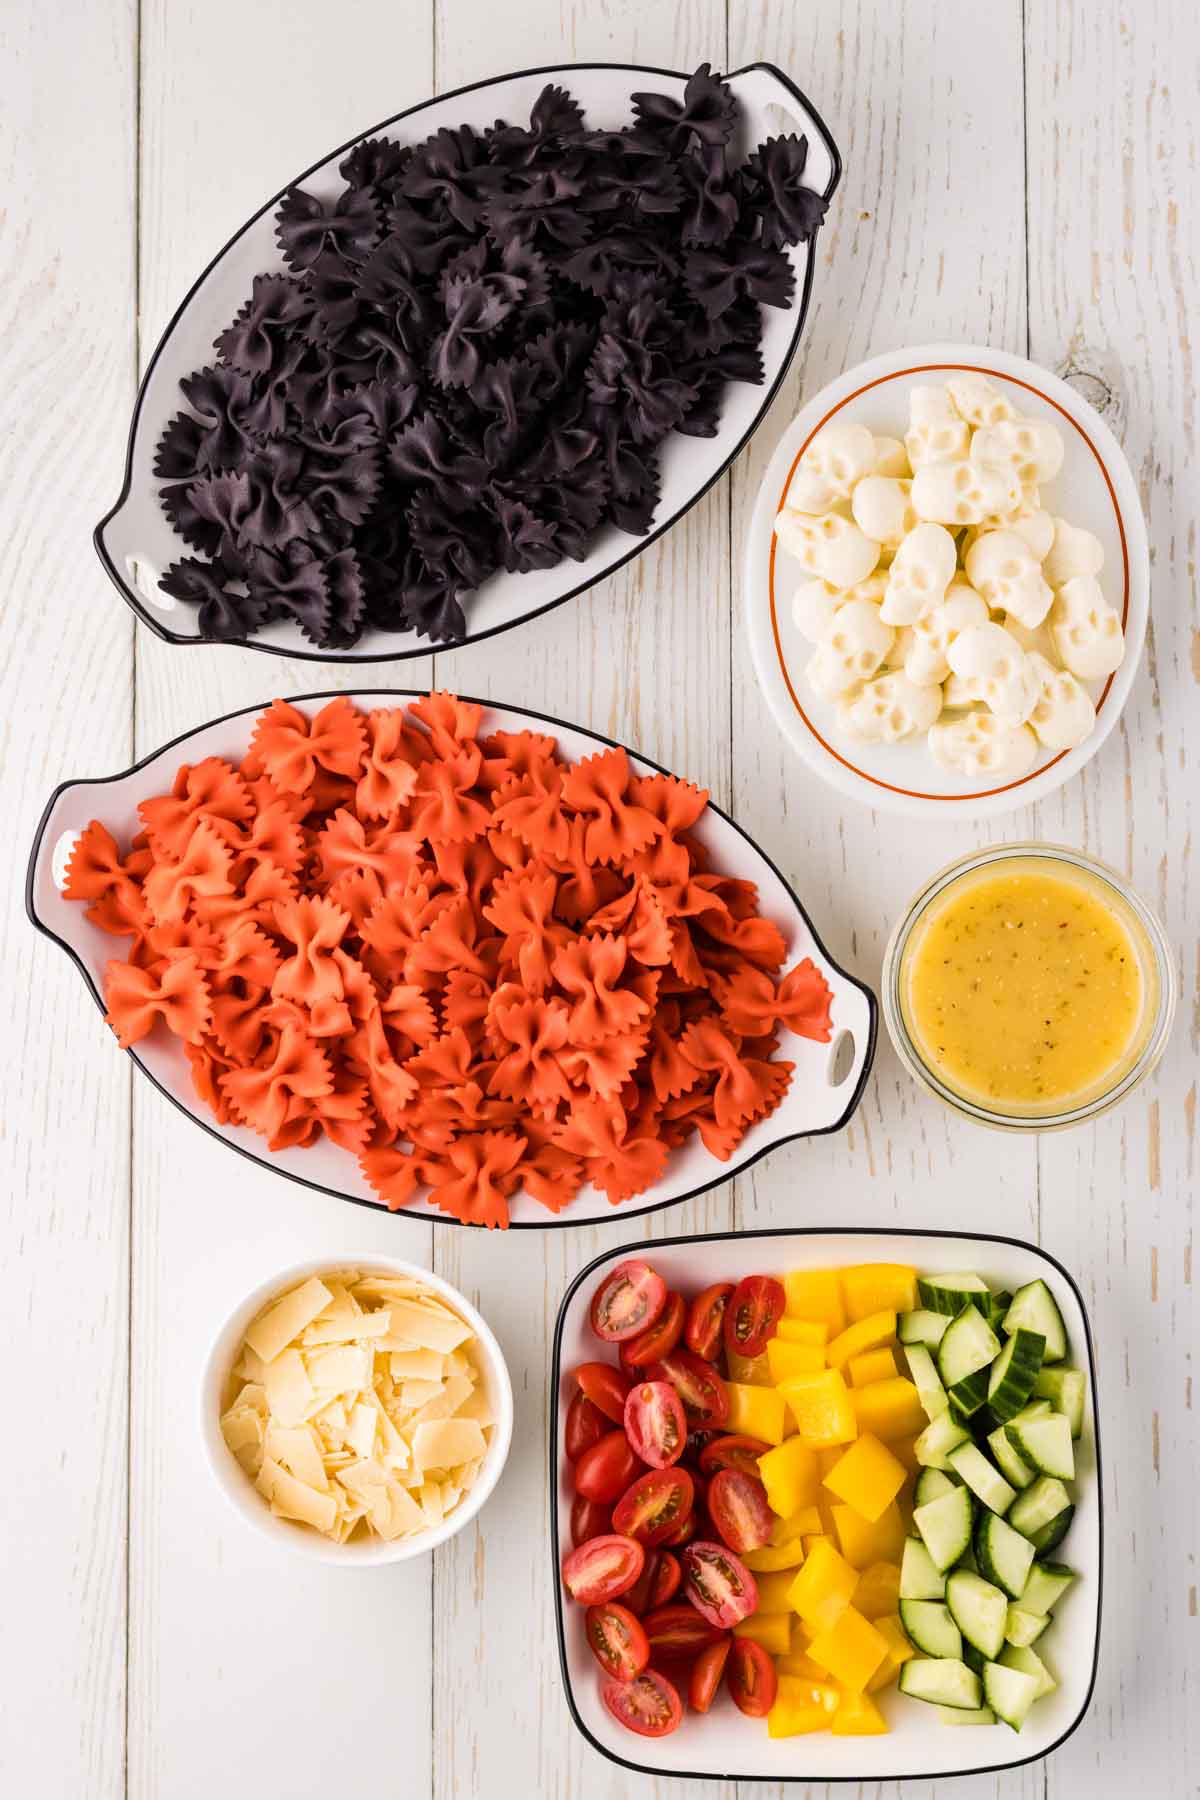
Recipe Ingredients: Spooky Halloween Pasta Salad
For the salad:
Ingredient Notes, Additions & Substitutions
Bow tie pasta: Of course you can use any shape pasta you like, but don’t you think the bow-ties look like little bats? Maybe it’s just me… 🙂
Veggies: I always use a combo of a colored bell pepper, cucumber, and tomatoes. Feel free to mix and match your veggies. Some other great options are: black or green olives, red onion, celery, artichoke hearts, and zucchini.
Dressing: This “semi-homemade” pasta salad dressing is my go-to, but in a pinch, use your favorite bottled Italian dressing. We love Ken’s Northern Italian.
Mozzarella balls (“ciliegine”): You’ll need fresh mozzarella balls like these. They are about the size of a cherry tomato.
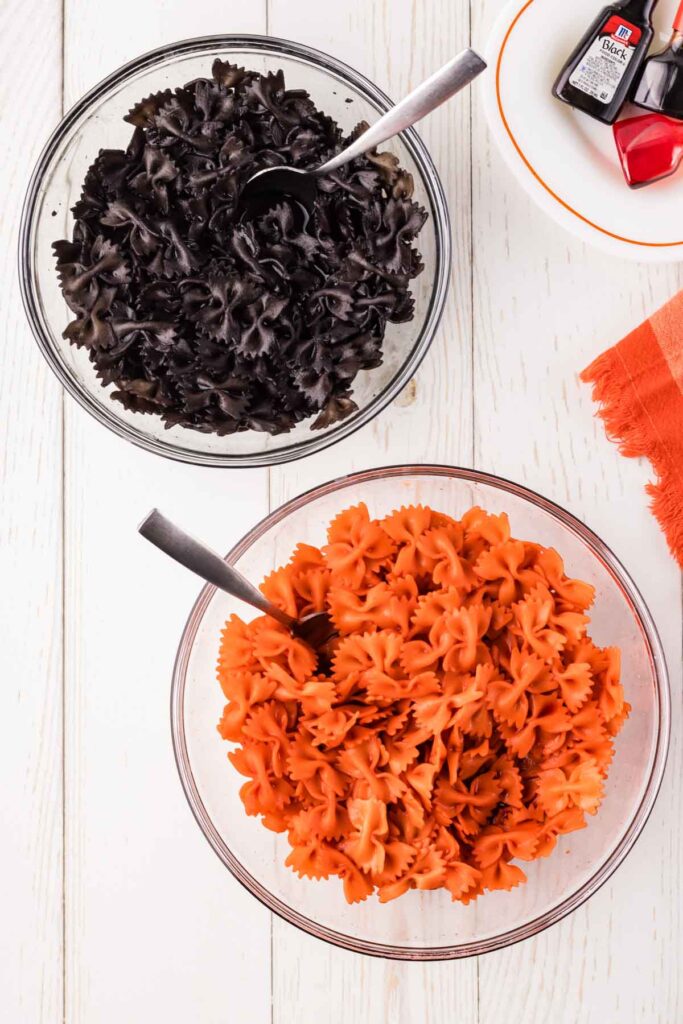
Food coloring: You’ll need black food coloring, along with red and yellow to make the black and orange-dyed pasta! Just regular, old-fashioned liquid food coloring is perfect — no need for anything fancy.
How to make Halloween pasta salad: Step by step
This is a step-by-step overview. For more detailed instructions, scroll down to the recipe card below or check out this detailed tutorial on how to dye pasta and this tutorial on how to make mozzarella skulls.


Expert Tips
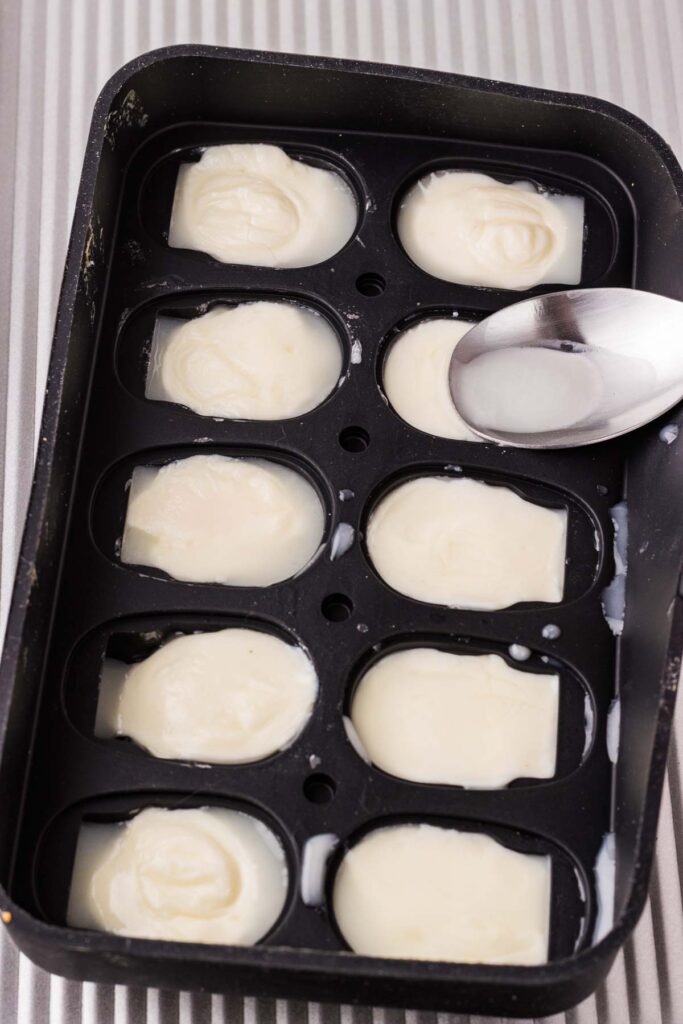
- Skull molds: I used ice cube molds from Amazon. These are the exact skull molds I used, but there are many to choose from. Just be sure they are oven/heat safe.
- Draining pasta: After coloring the pasta, make sure you drain each color separately so the colors don’t mix.
- Mozzarella balls: Blot each of the mozzarella balls with a paper towel before placing them into the mold to ensure there is no excess moisture.
- Veggies: Mix and match your veggies however you like! I always like to use an orange bell pepper to keep with the Halloween theme 🙂
- Storage: This pasta salad holds up well in the fridge, so you can definitely make it a day ahead. I like to wait until you’re ready to serve to add the dressing. Store leftovers in an airtight container for about 2-3 days.
How to serve
Serve in a skeleton bowl: Serve up this pasta salad in a spooky skeleton-themed bowl like this one!
Hollowed orange bell peppers: Carve orange bell peppers like mini jack-o’-lanterns and fill them with the pasta salad. These look adorable on a Halloween buffet and give off a spooky potluck food vibe.
Mason jars: Layer the salad into mason jars or clear cups so the eerie dyed pasta and toppings show through!

Did you try this recipe?
Let us know your thoughts on this spooky Halloween pasta salad by leaving a star rating below or sharing it on Instagram!
Thank you! ~ Casey
Spooky Halloween Pasta Salad
Equipment
- Red, yellow, and black food coloring Buy on Amazon: Black food coloring, red/yellow food coloring.
- Skull molds (ice cube trays) Buy on Amazon
Ingredients
For the pasta salad
- 16 oz. bow tie pasta
- 16-20 fresh mozzarella balls (ciliegine)
- 2 cups fresh veggies, chopped colored bell peppers, cucumber, cherry tomatoes
- 1 cup Italian dressing homemade pasta salad dressing
- 1/2 cup Parmesan cheese, shaved or grated
For the dyed pasta
- 1 tsp black food coloring
- 1/2 tsp red food coloring
- 1/2 tsp yellow food coloring
Instructions
- Boil the pasta: Bring a large pot of water to a boil. Add pasta and boil to al dente ONE MINUTE less than the package instructions. IMPORTANT: Before you drain the pasta, set out two medium/large bowls. Add 1 cup of the hot pasta water to each bowl.
- Prep the dye: In one bowl of the reserved pasta water, add 1 tsp. of black food coloring (or enough until the color is dark black, you can play around with the shade). Stir well. To the other bowl of reserved pasta water, add 1/2 tsp. of yellow food coloring and 1/2 tsp. of red food coloring (Or until the water is dark orange. Again, feel free to play around with the shade!). Stir well.
- Dye the pasta: When the pasta is done cooking, drain the remaining water. Add half of the drained pasta to the bowl with the black food coloring and half of the pasta to the bowl with the orange food coloring. Stir, stir, stir until the pasta in each bowl is completely submerged in the colored water(s). I like to stir and toss it for at least a minute to make sure all the pasta is completely coated with the color. Let the pasta sit for 5 minutes. Give it one more big stir, then carefully drain and rinse in cool water. Note: Drain each color of pasta separately so the colors don’t mix. For best results, after draining, transfer each color pasta to a separate bowl until it’s had a chance to cool and dry completely so the colors don’t mix. Cool pasta completely. For a full tutorial with details photoo on how to dye pasta, check out this post: How to dye edible pasta.
- Make the mozzarella skulls: Preheat oven to 350°F. While the pasta is cooling and drying, make the skulls. Make sure each mozzarella ball is free from moisture by blotting with a paper towel. Then place 1 mozzarella ball in each skull mold. Place mold on a baking sheet and bake at 350°F for 8-10 minutes or until the mozzarella is just soft enough to spread. With the back of a spoon, press the softened mozzarella into the mold, pressing down gently. Blot off any excess moisture with a paper towel. Refrigerate for about 10 minutes until cool, then carefully unmold each skull. For a full tutorial with details and photos on how to make mozzarella skulls, check out this post: How to make mozzarella skulls.
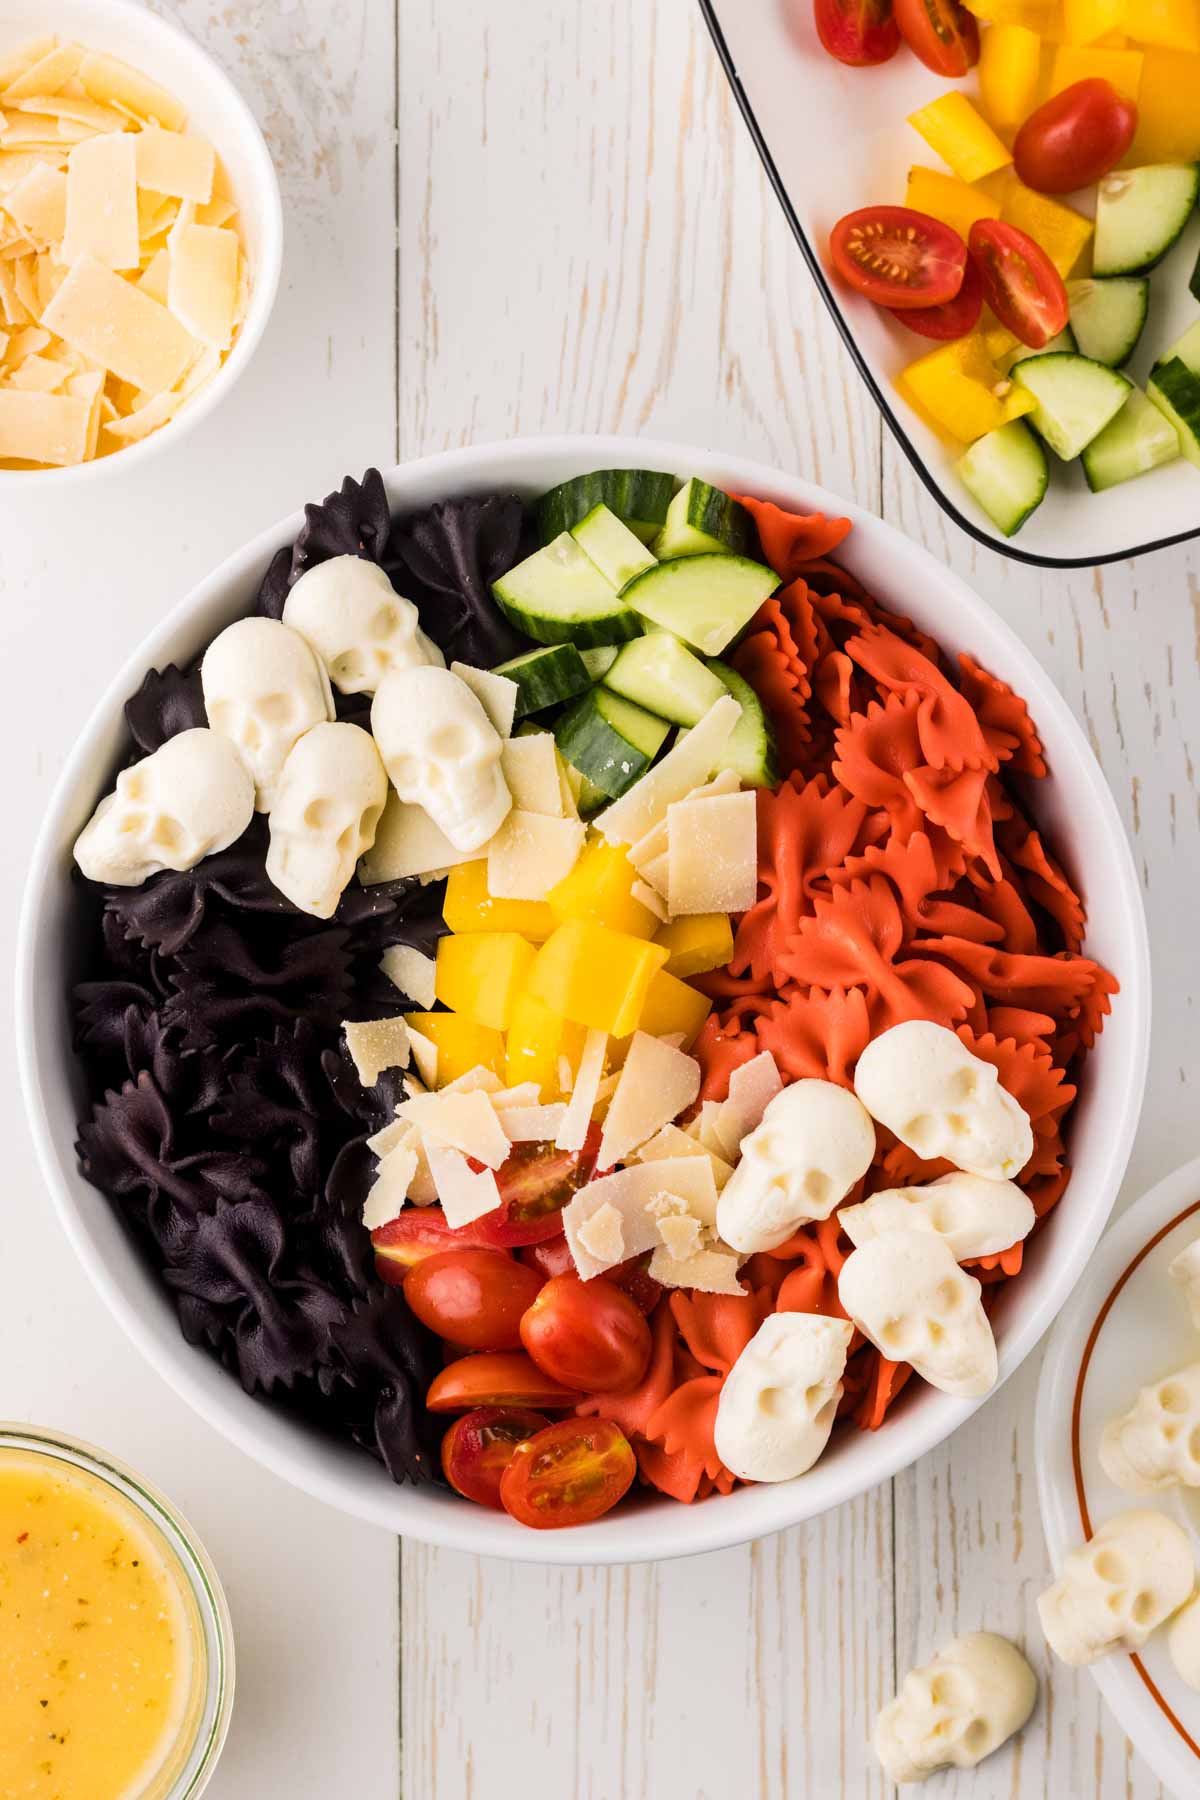
- Assemble/Finish: In a large serving bowl, add the cooled/dried pasta (both colors) and veggies. Toss with the dressing until everything is well coated. Add the skulls decoratively over the top and finish with Parmesan cheese.
Notes
Expert Tips
- Skull molds: I used ice cube-shaped molds from Amazon. These are the exact skull molds I used, but there are many to choose from. Just be sure they are oven/heat safe.
- Draining pasta: After coloring the pasta, make sure you drain each color separately so the colors don’t mix.
- Mozzarella balls: Blot each of the mozzarella balls with a paper towel before placing them into the mold to ensure there is no excess moisture.
- Veggies: Mix and match your veggies however you like! I always like to use an orange bell pepper to keep with the Halloween theme 🙂
- Storage: This pasta salad holds up well in the fridge, so you can definitely make it a day ahead of time. I like to wait until you’re ready to serve to add the dressing. Store leftovers in an airtight container for about 2-3 days.


This will be the star of your Halloween spread! And it’s a lot easier to make than you think! Hope you love it! XO ~ Casey